
How to create a custom payment type
How to create and use a payment type
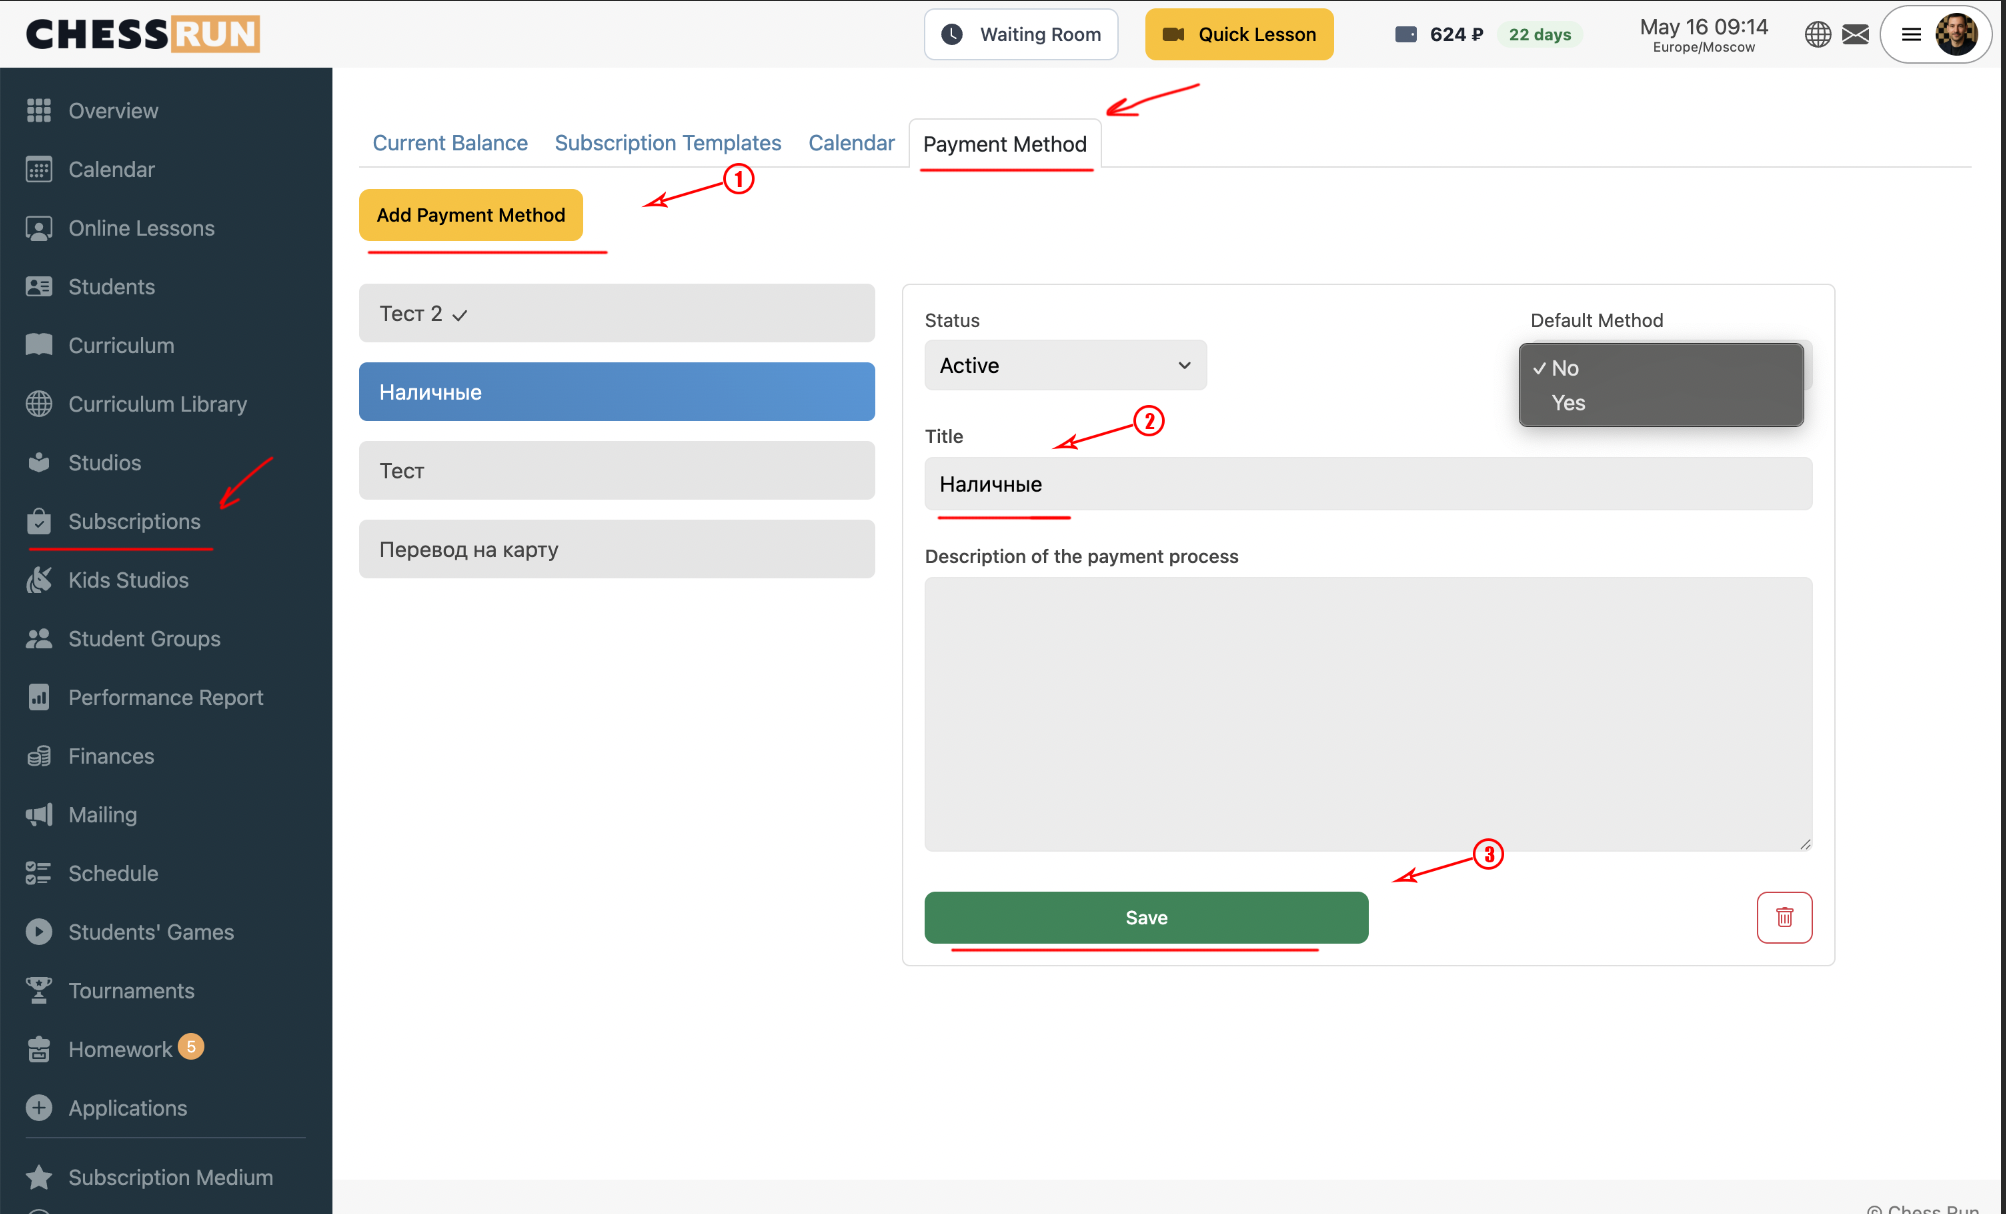
Go to the payments section and open the payment types page. Here you'll see a list of existing types. To add a new payment type, click 'Add' and enter a name (e.g., 'Cash', 'Card transfer', or another convenient label). Custom payment types are for internal use only and are not linked to real payment gateways.
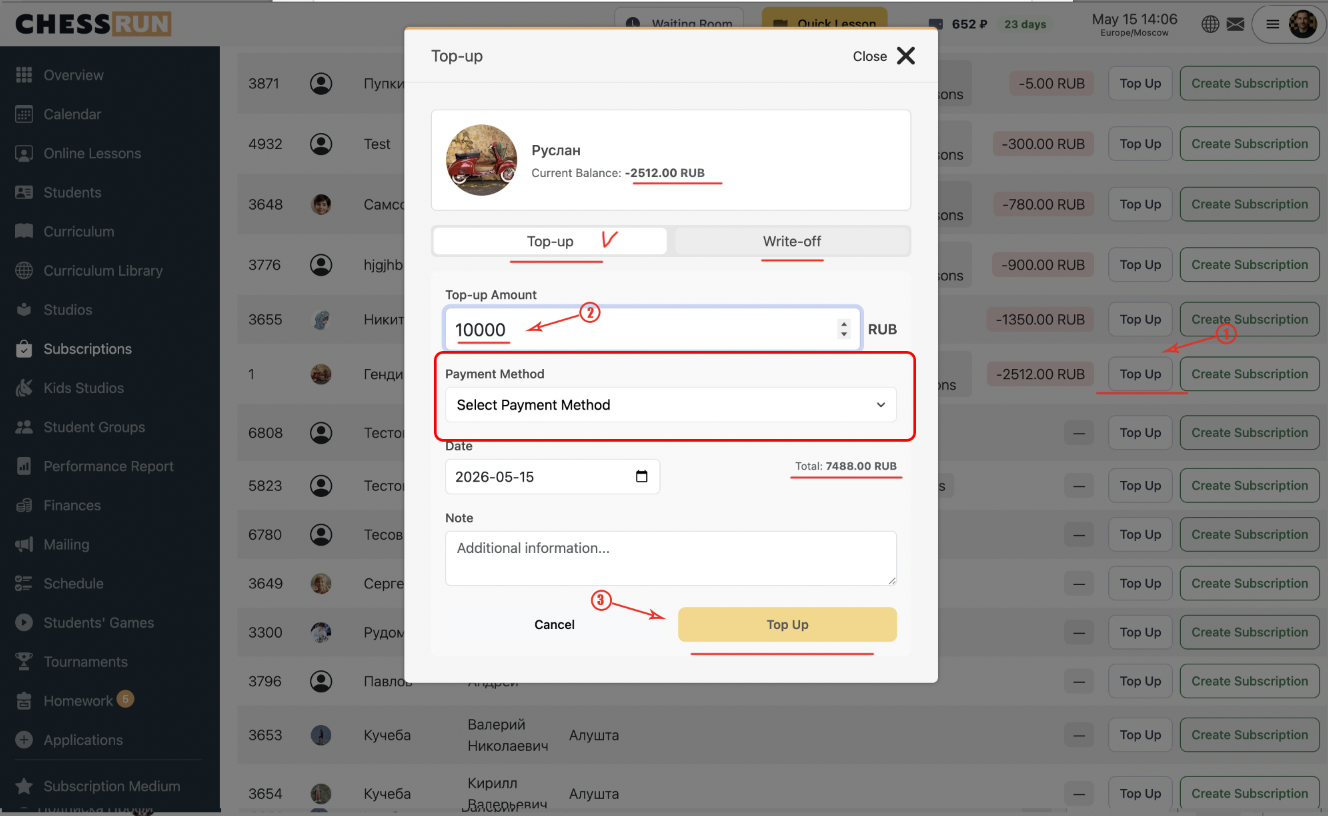
Go to the student subscriptions section. Find the desired student and click 'Top up' next to their name. In the popup window, enter the amount, select the payment type you created, and optionally write a comment. If you are making an adjustment or deduction, be sure to specify the reason for the deduction.
FAQ
Can I edit or delete a previously created payment type?
Yes, you can edit the name or delete your custom payment type in the payment types settings.
Why use custom payment types?
They allow you to record all kinds of top-ups and deductions, even if the payment was made outside the online system, such as in cash.