
How does the permanent school schedule work?
Main features of the permanent schedule
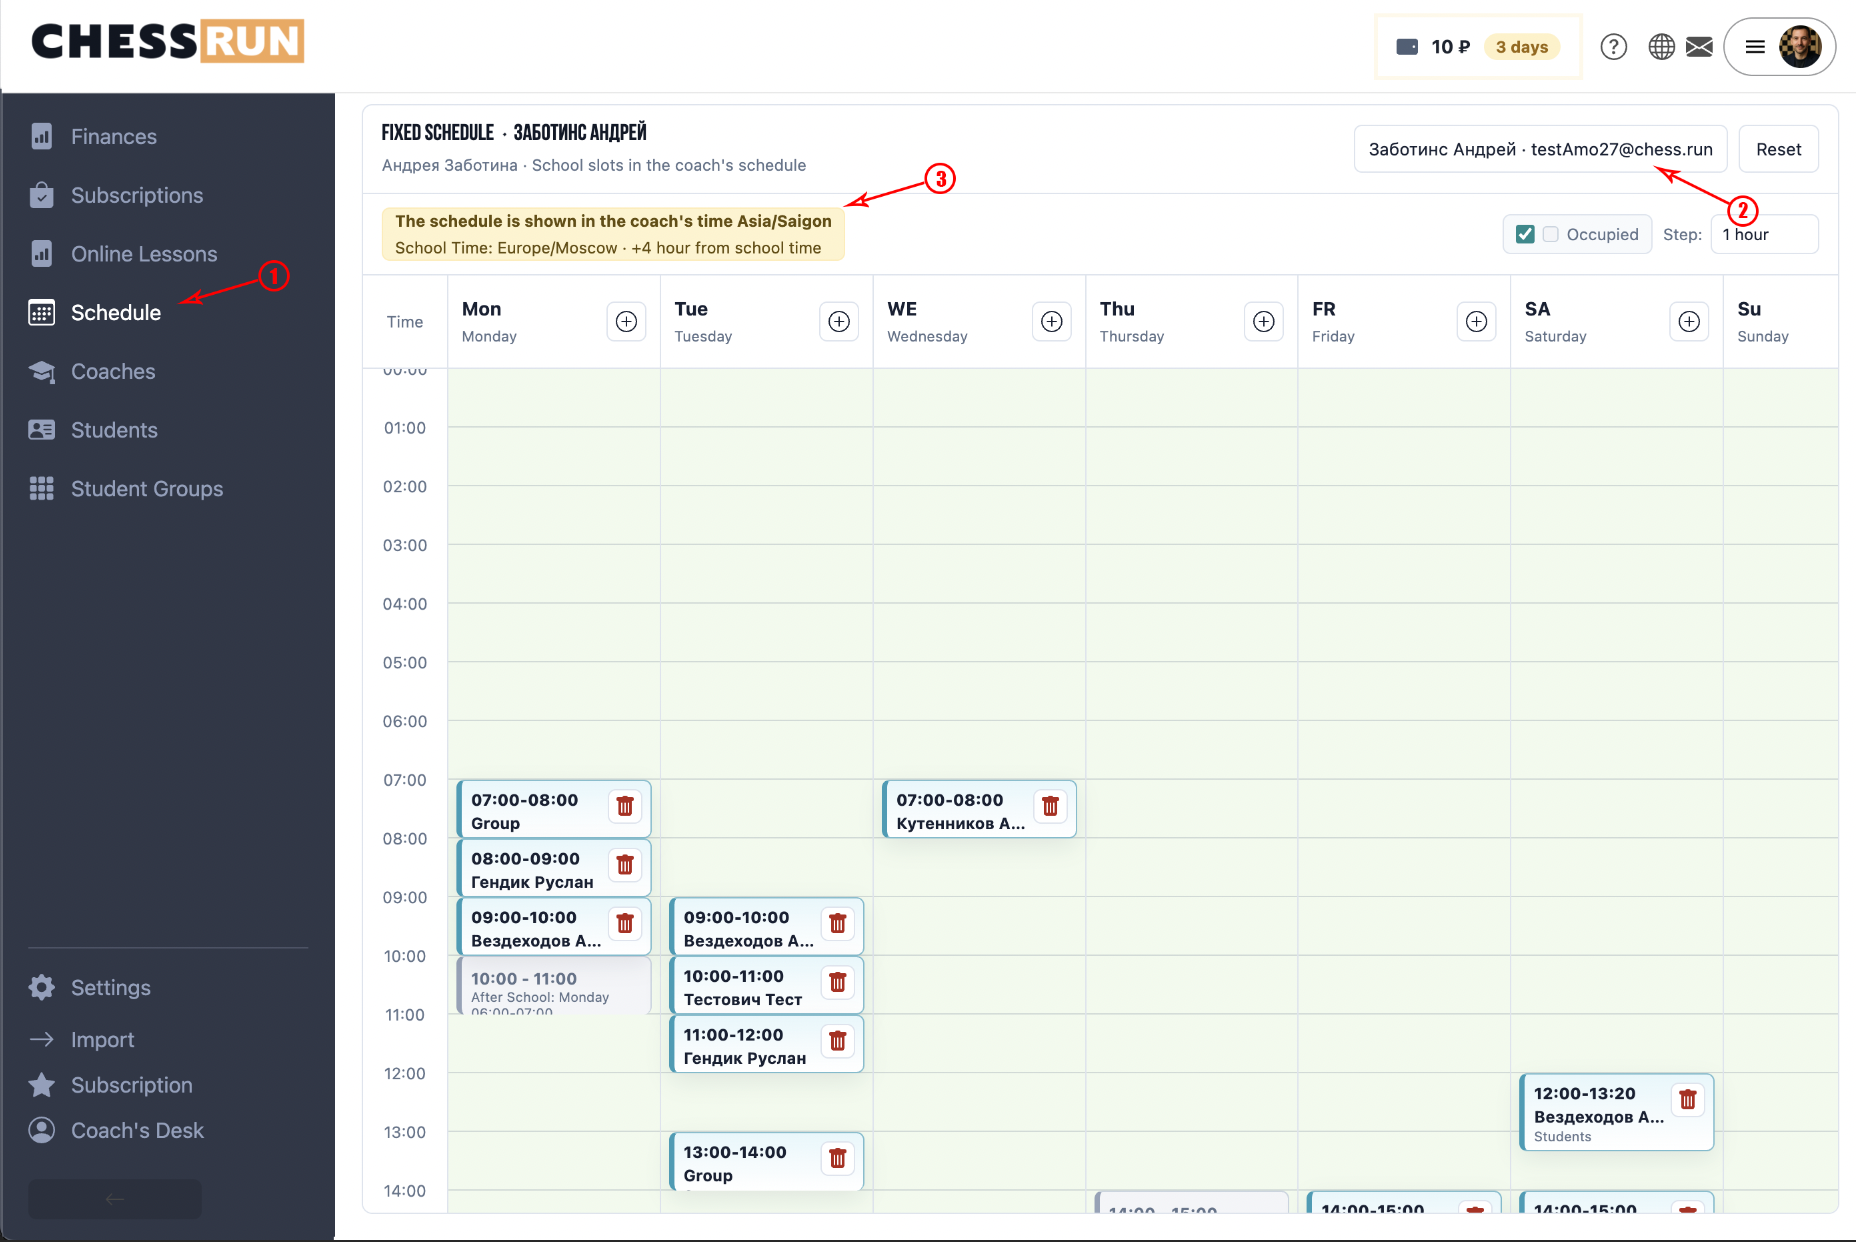
The schedule page shows the selected trainer's weekly grid. In the grid, you can see:
- the trainer's free time;
- the trainer's occupied slots;
- school slots;
- timezone differences if the school's and trainer's times differ.
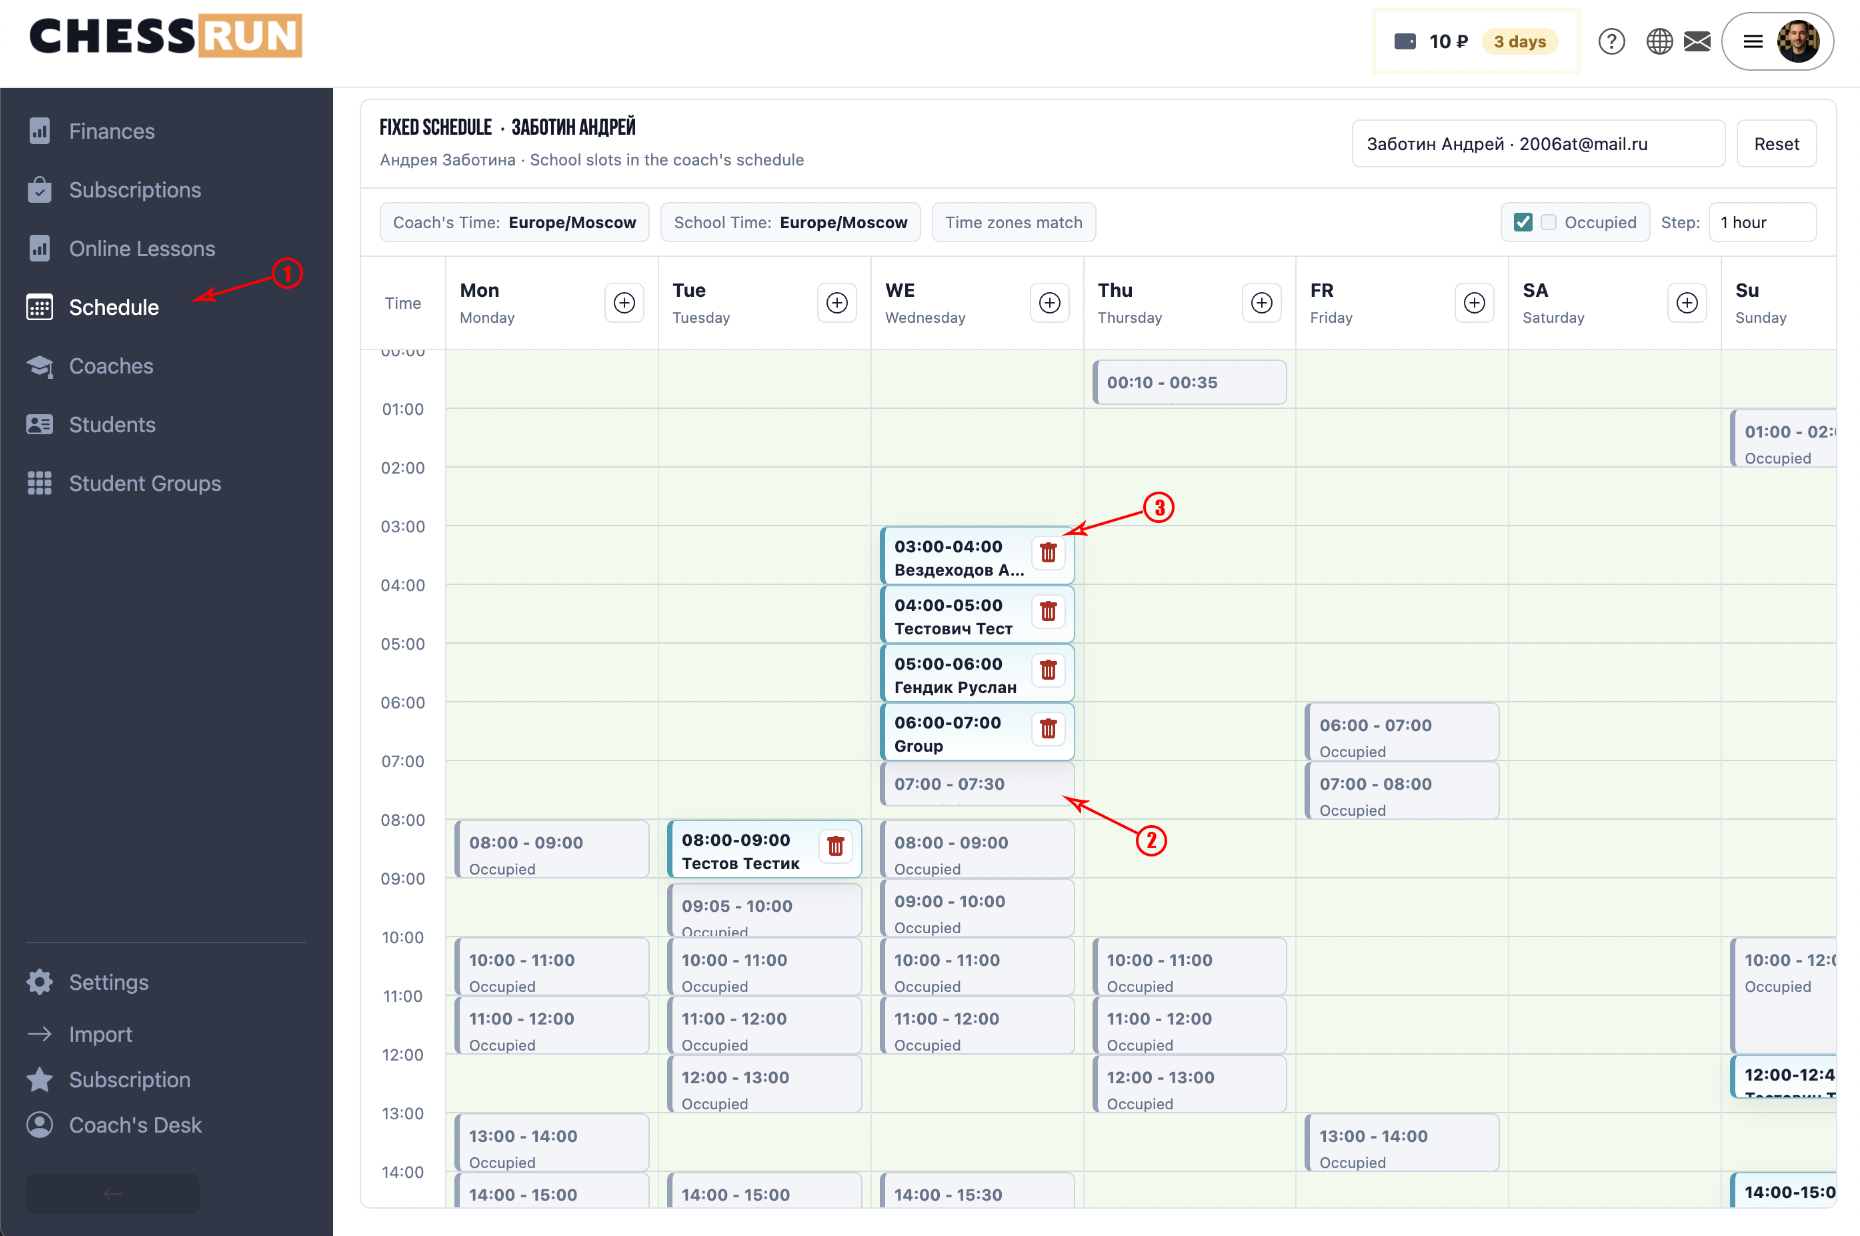
At the top of the page, select a school trainer. After selecting, the system will show their weekly schedule grid along with already occupied intervals.
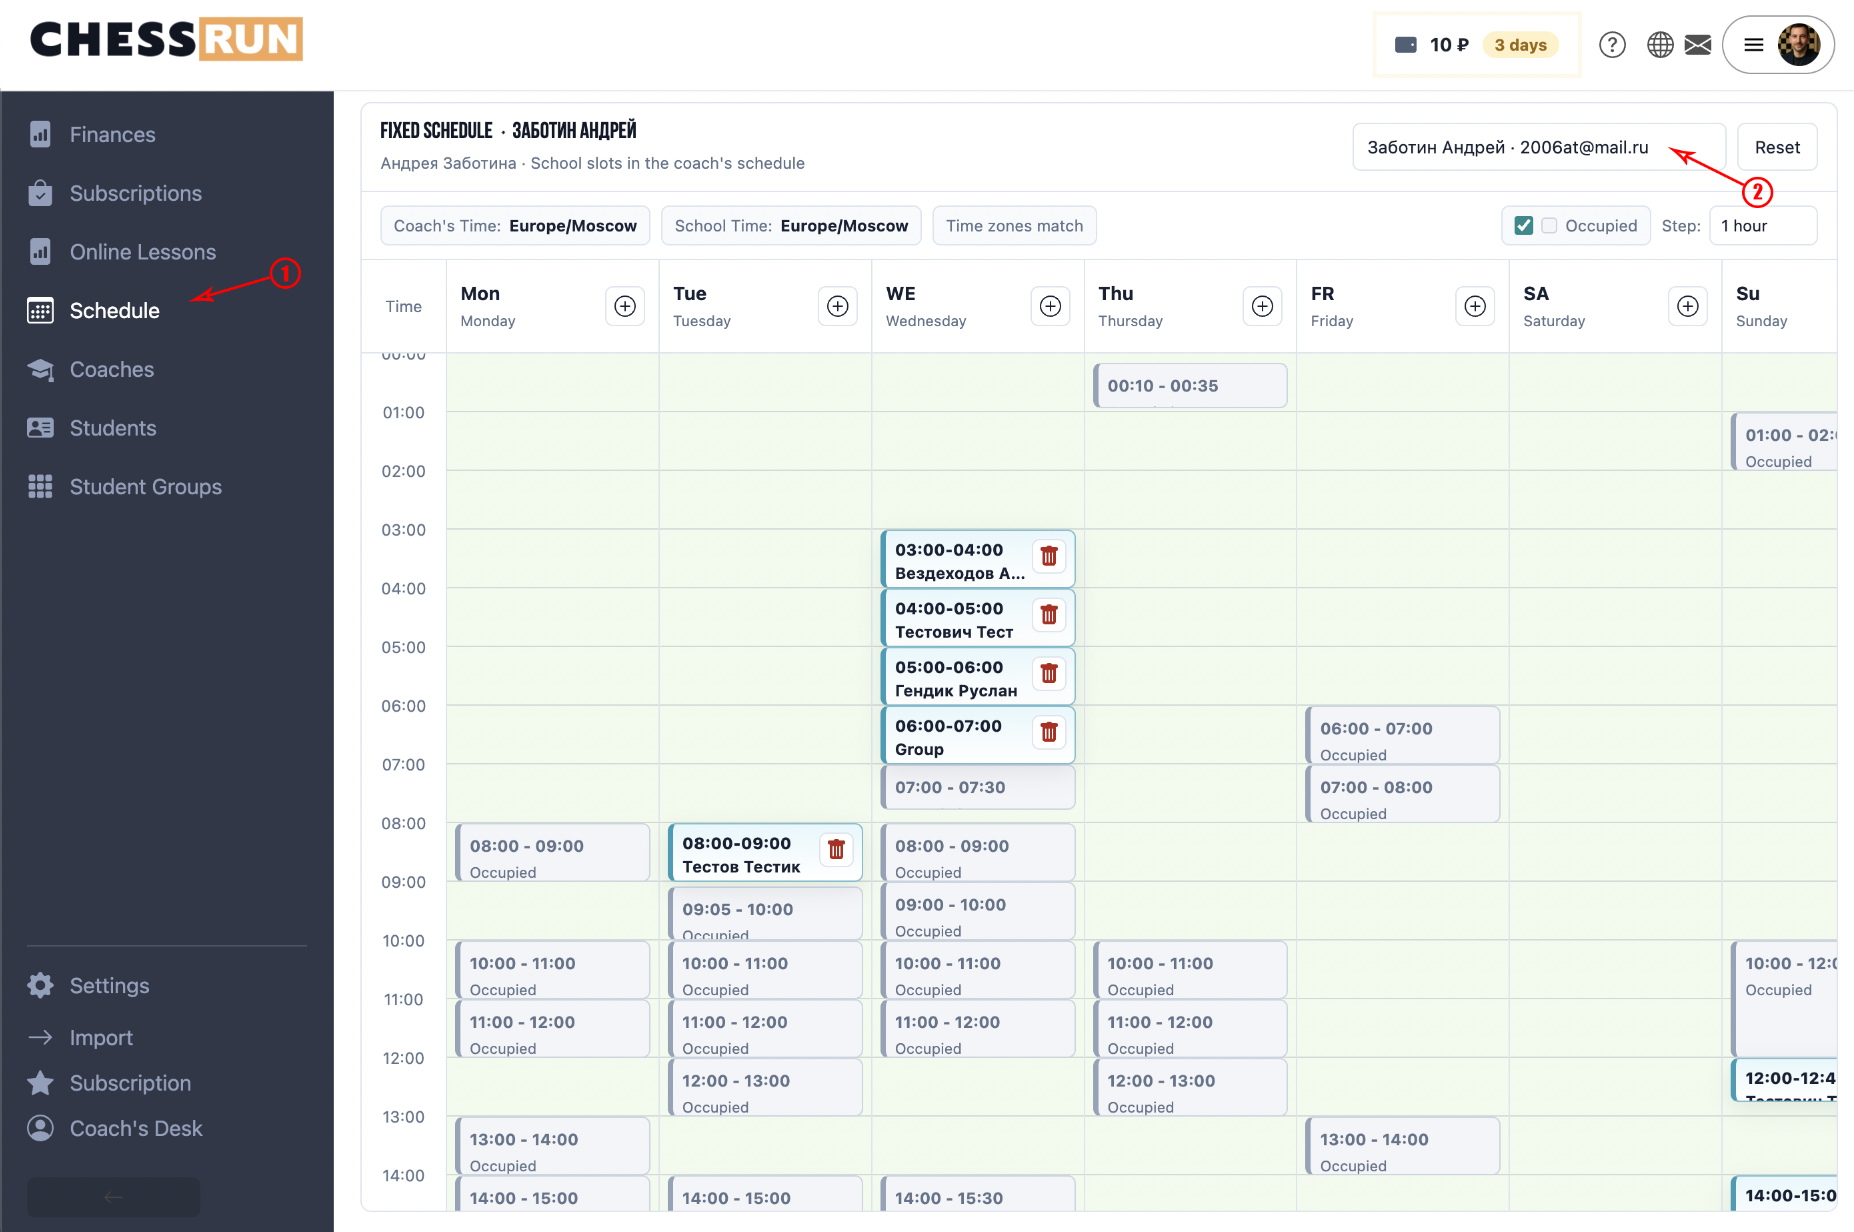
Several visual states are used in the schedule:
- free slot — time available for adding a school lesson;
- occupied by trainer — this time is already busy and cannot be chosen;
- school slot — a regular lesson added by the school.
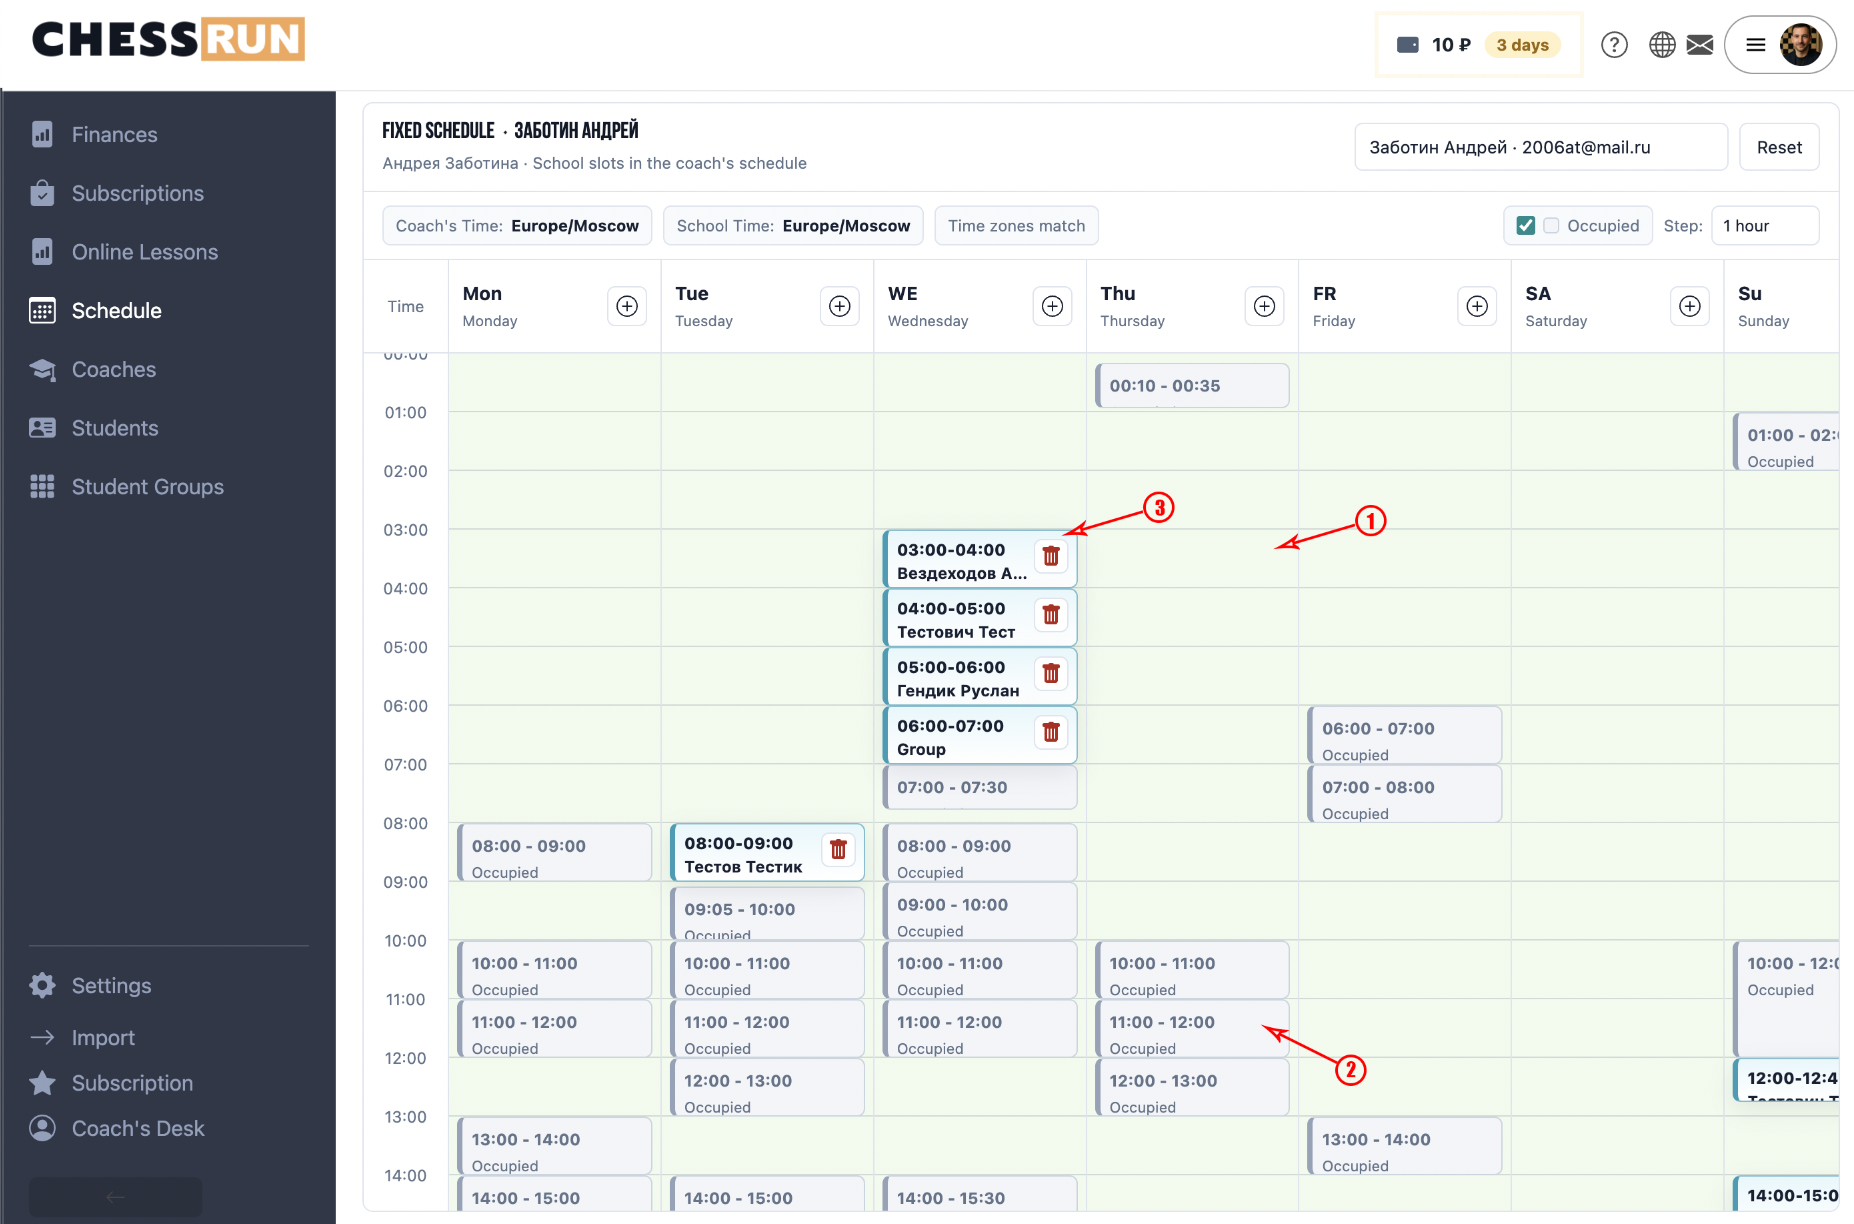
To add a slot, click on the free time in the grid or use the add slot button.
In the modal, you need to select:
- day of the week;
- start and end time;
- student or group;
- lesson type.
If the time is occupied, the system will show a warning and will not allow you to save a conflicting slot.
For an individual lesson, select a student via search. For a group lesson, select a group assigned to the trainer. If a student is not yet assigned to the trainer, the system may automatically link the student when adding to the schedule.
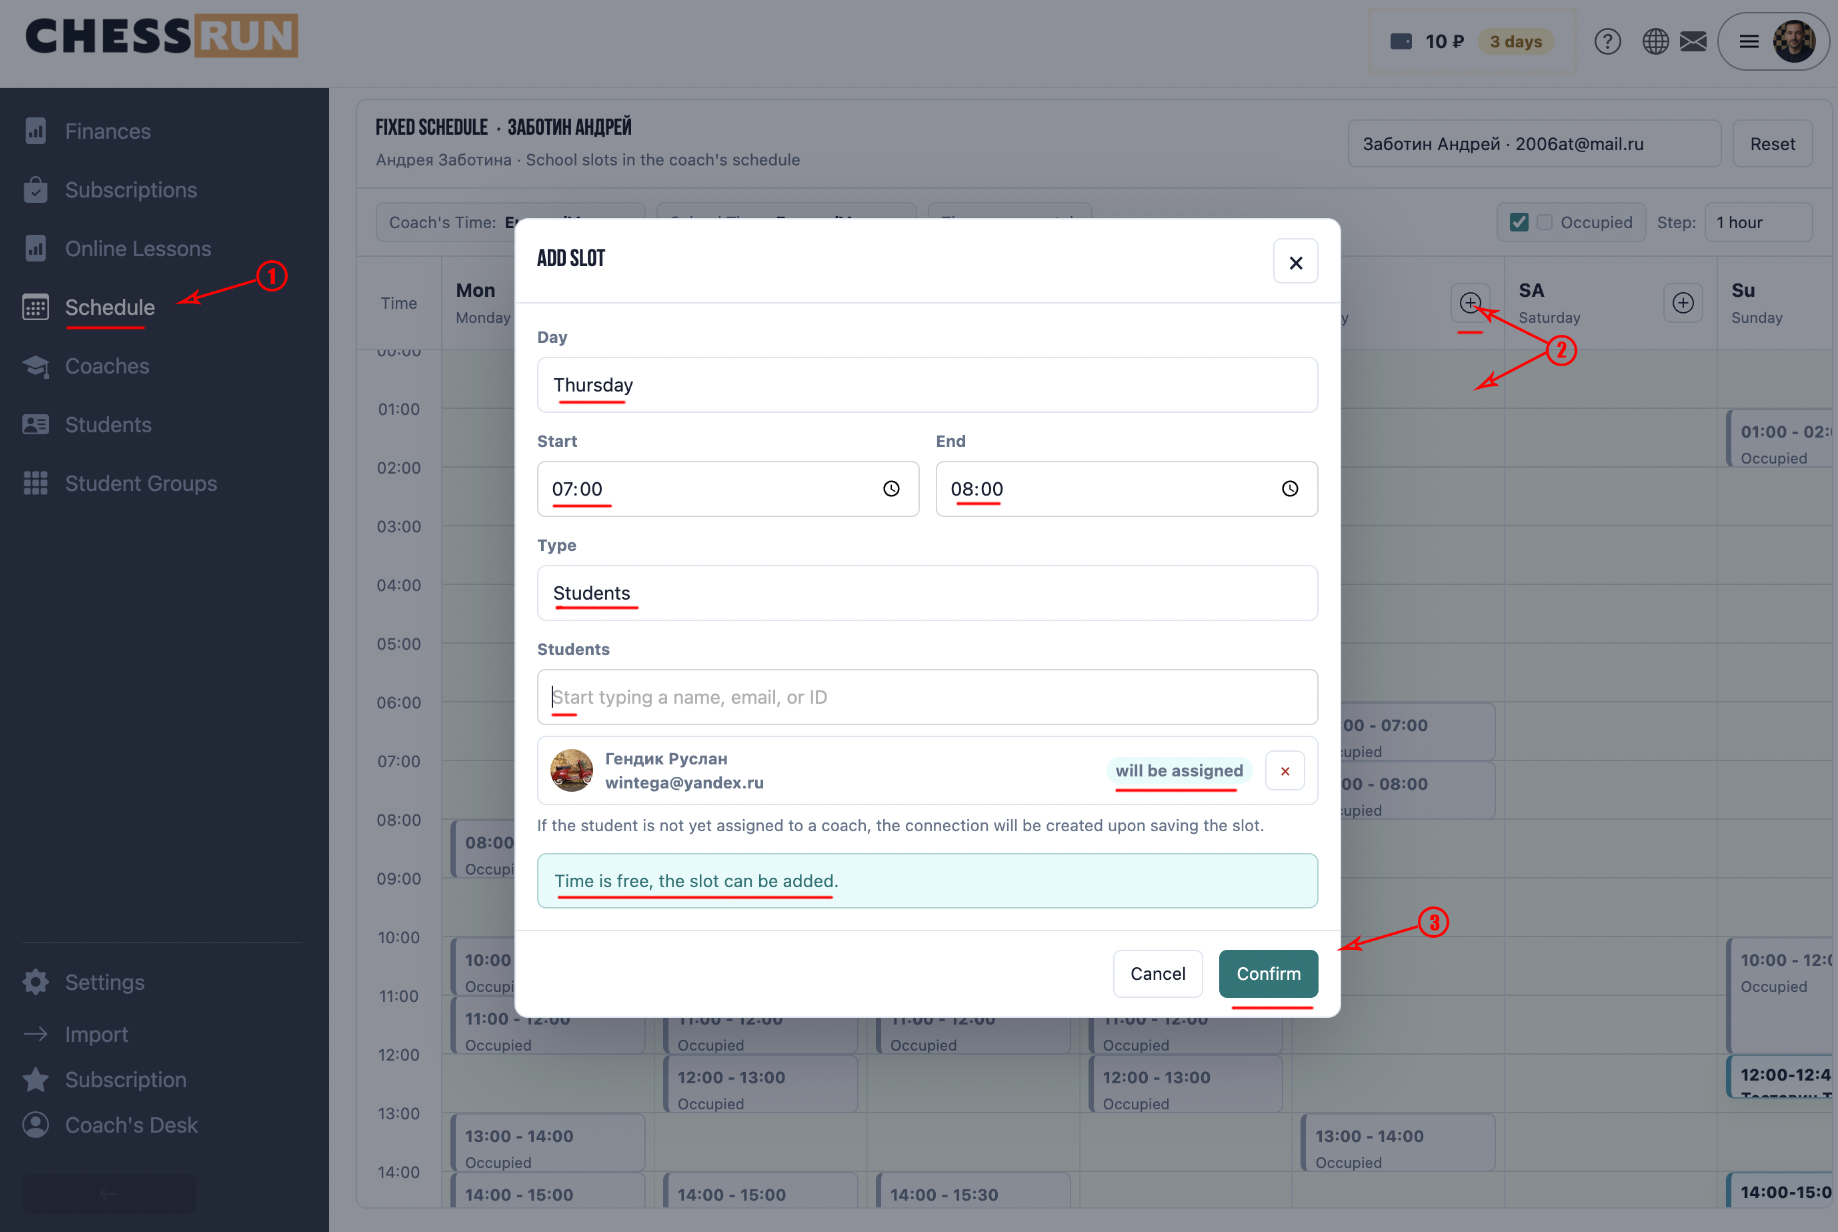
The schedule is shown in the trainer's time. If the school's timezone is different, a warning will appear at the top. Important: the school administrator sees hints in school time to avoid mistakes when adding a slot.
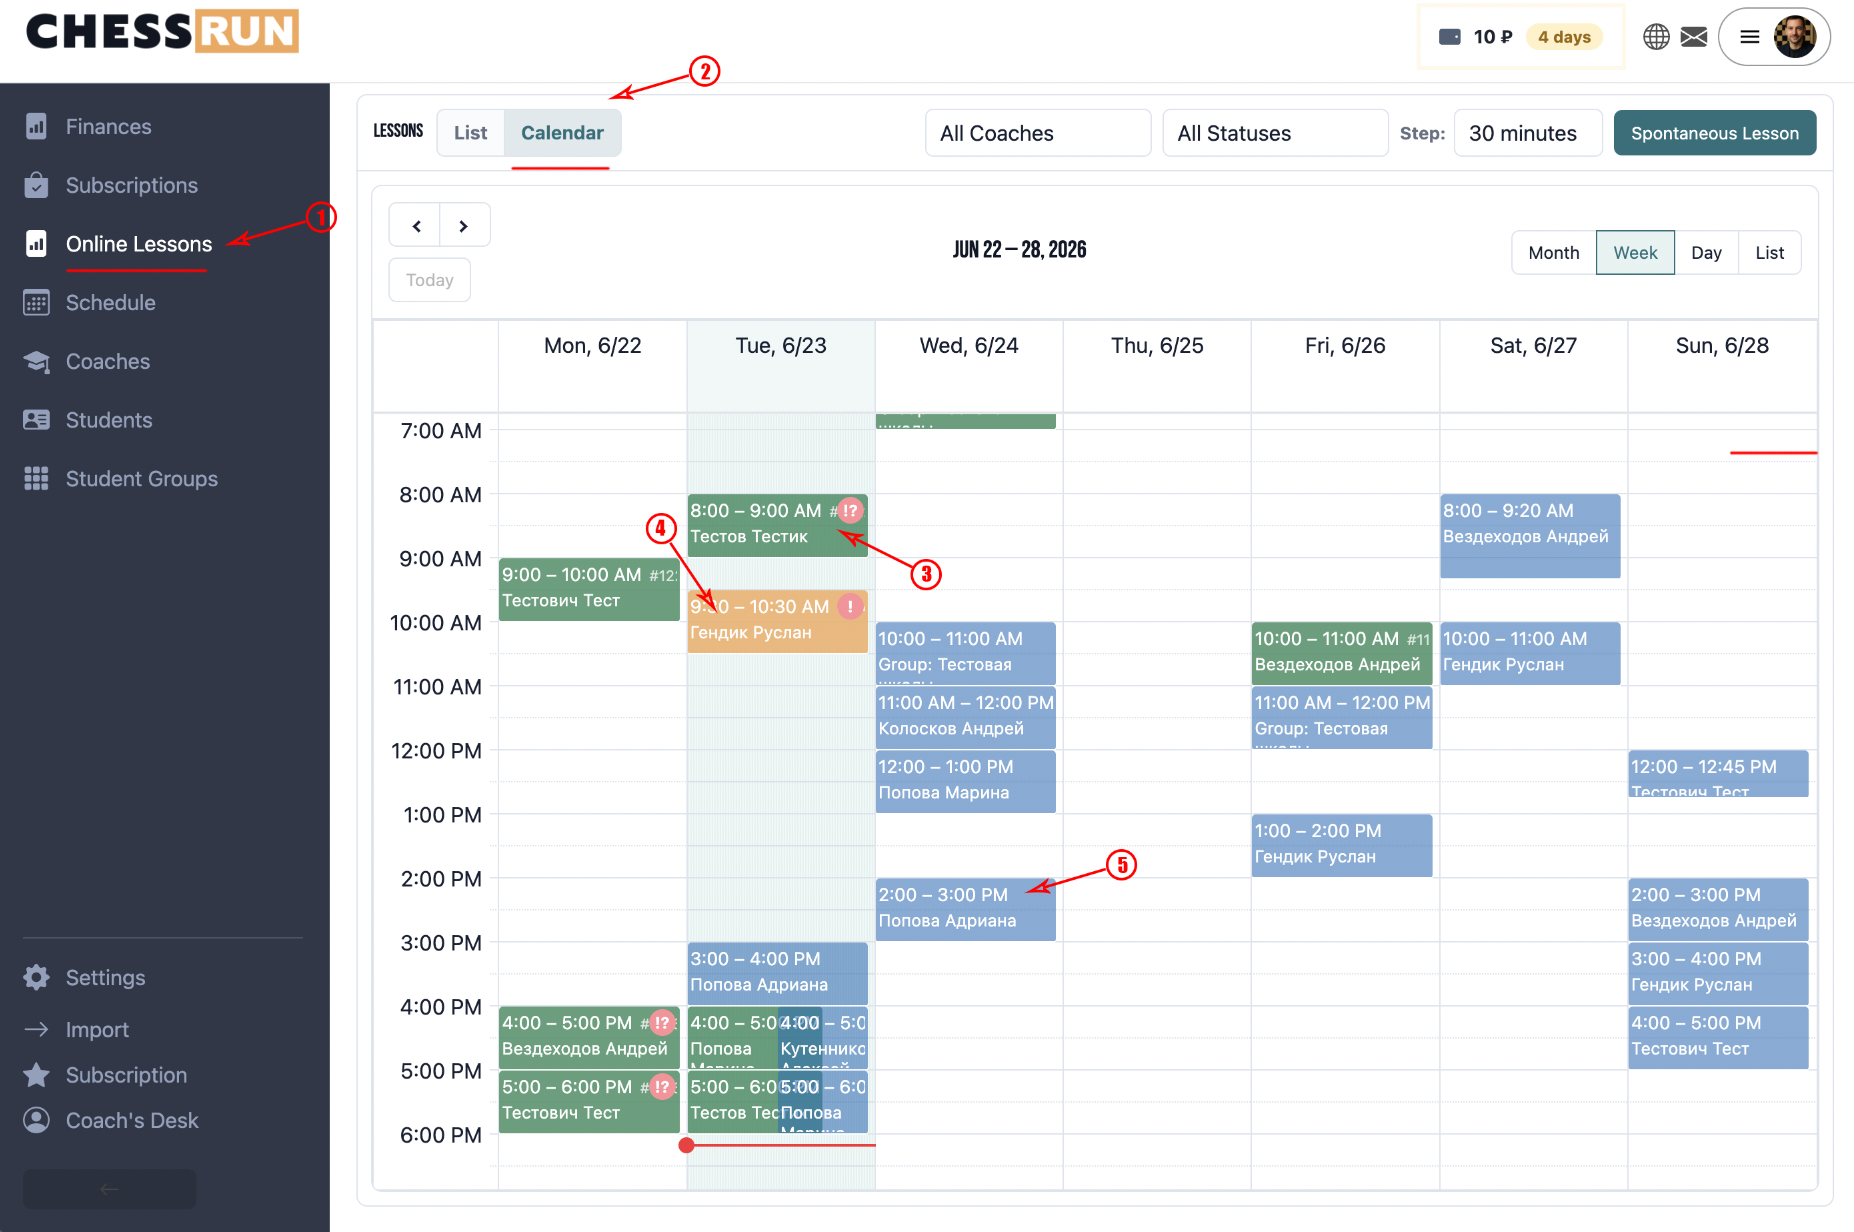
The permanent schedule itself is not finalized lessons. The system uses the schedule to show future lessons in the school calendar. After a lesson is created or materialized, you can open, move, cancel, or complete it.
FAQ
Can I edit a slot that was added to the schedule?
Yes, added slots can be edited or deleted if needed.
What should I do if there are overlapping slots?
The system will warn about a time conflict and won’t let you save overlapping slots.