
How to work with student groups?
Working with student groups
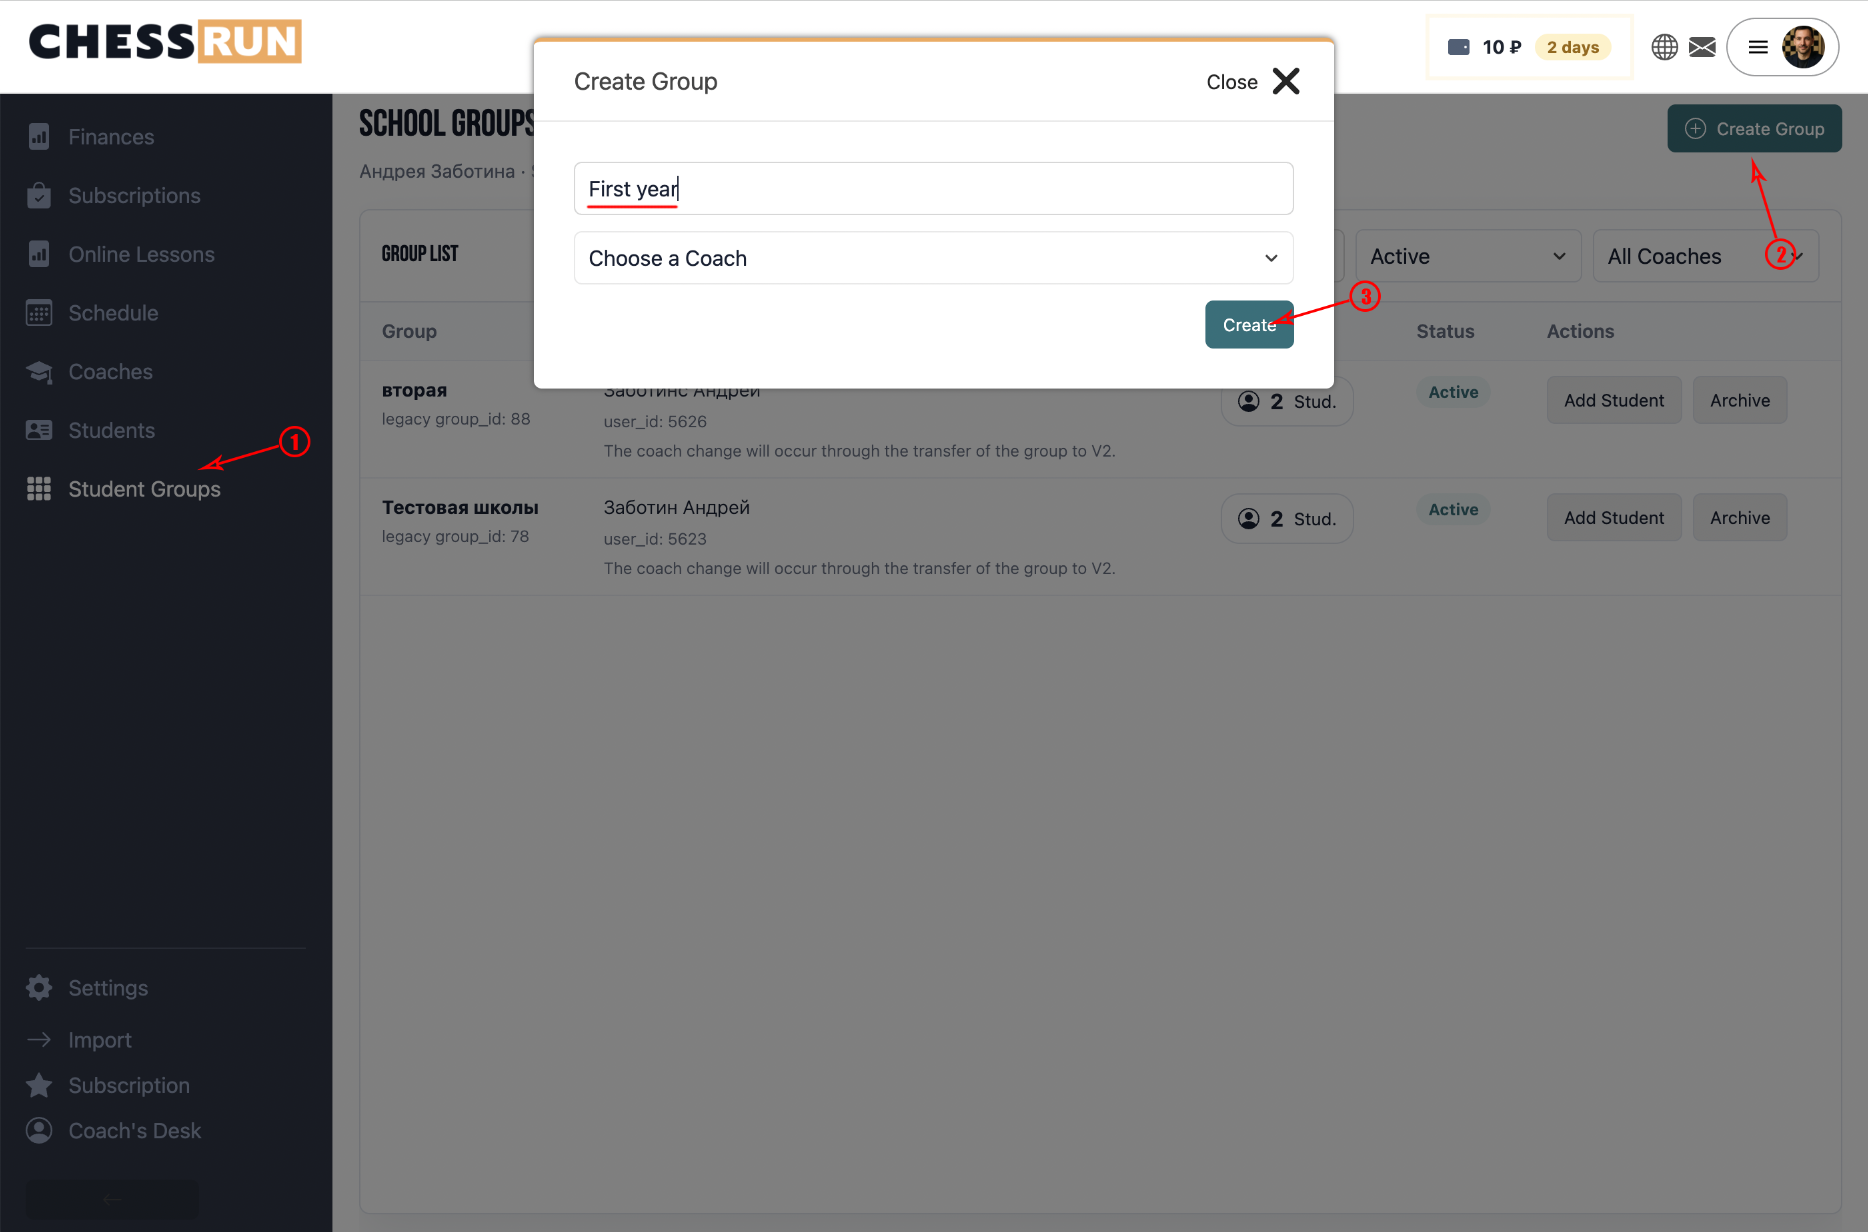
To create a group, click 'Create Group,' enter the name, and select a coach. The group’s coach is used in the schedule, lessons, and school filters.
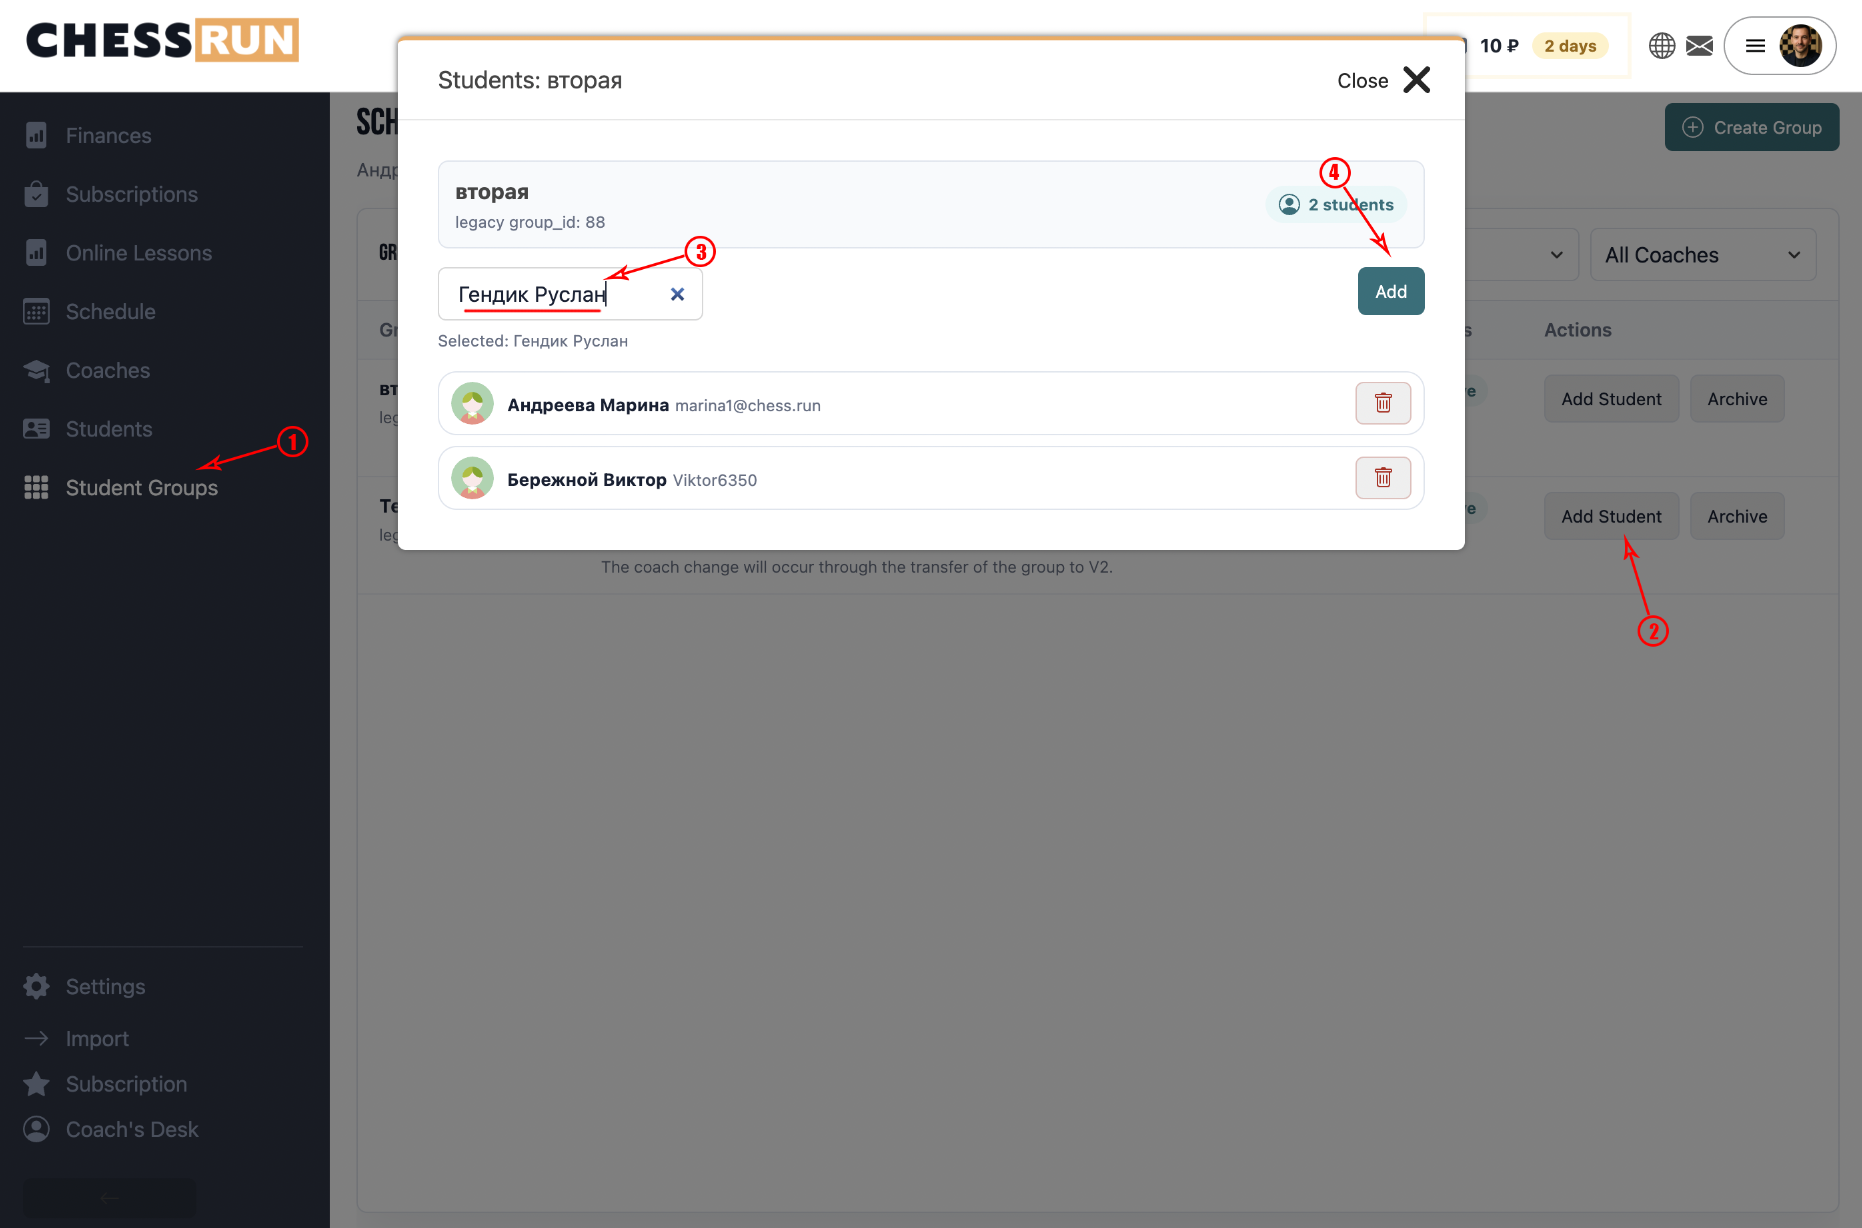
The group card displays the number of students. Clicking on the number opens a group membership modal, where you can:
- view group members;
- search for students in the school;
- add a student to the group;
- remove a student from the group.
If a student is not yet in the school, first add or create them in the 'Students' section.
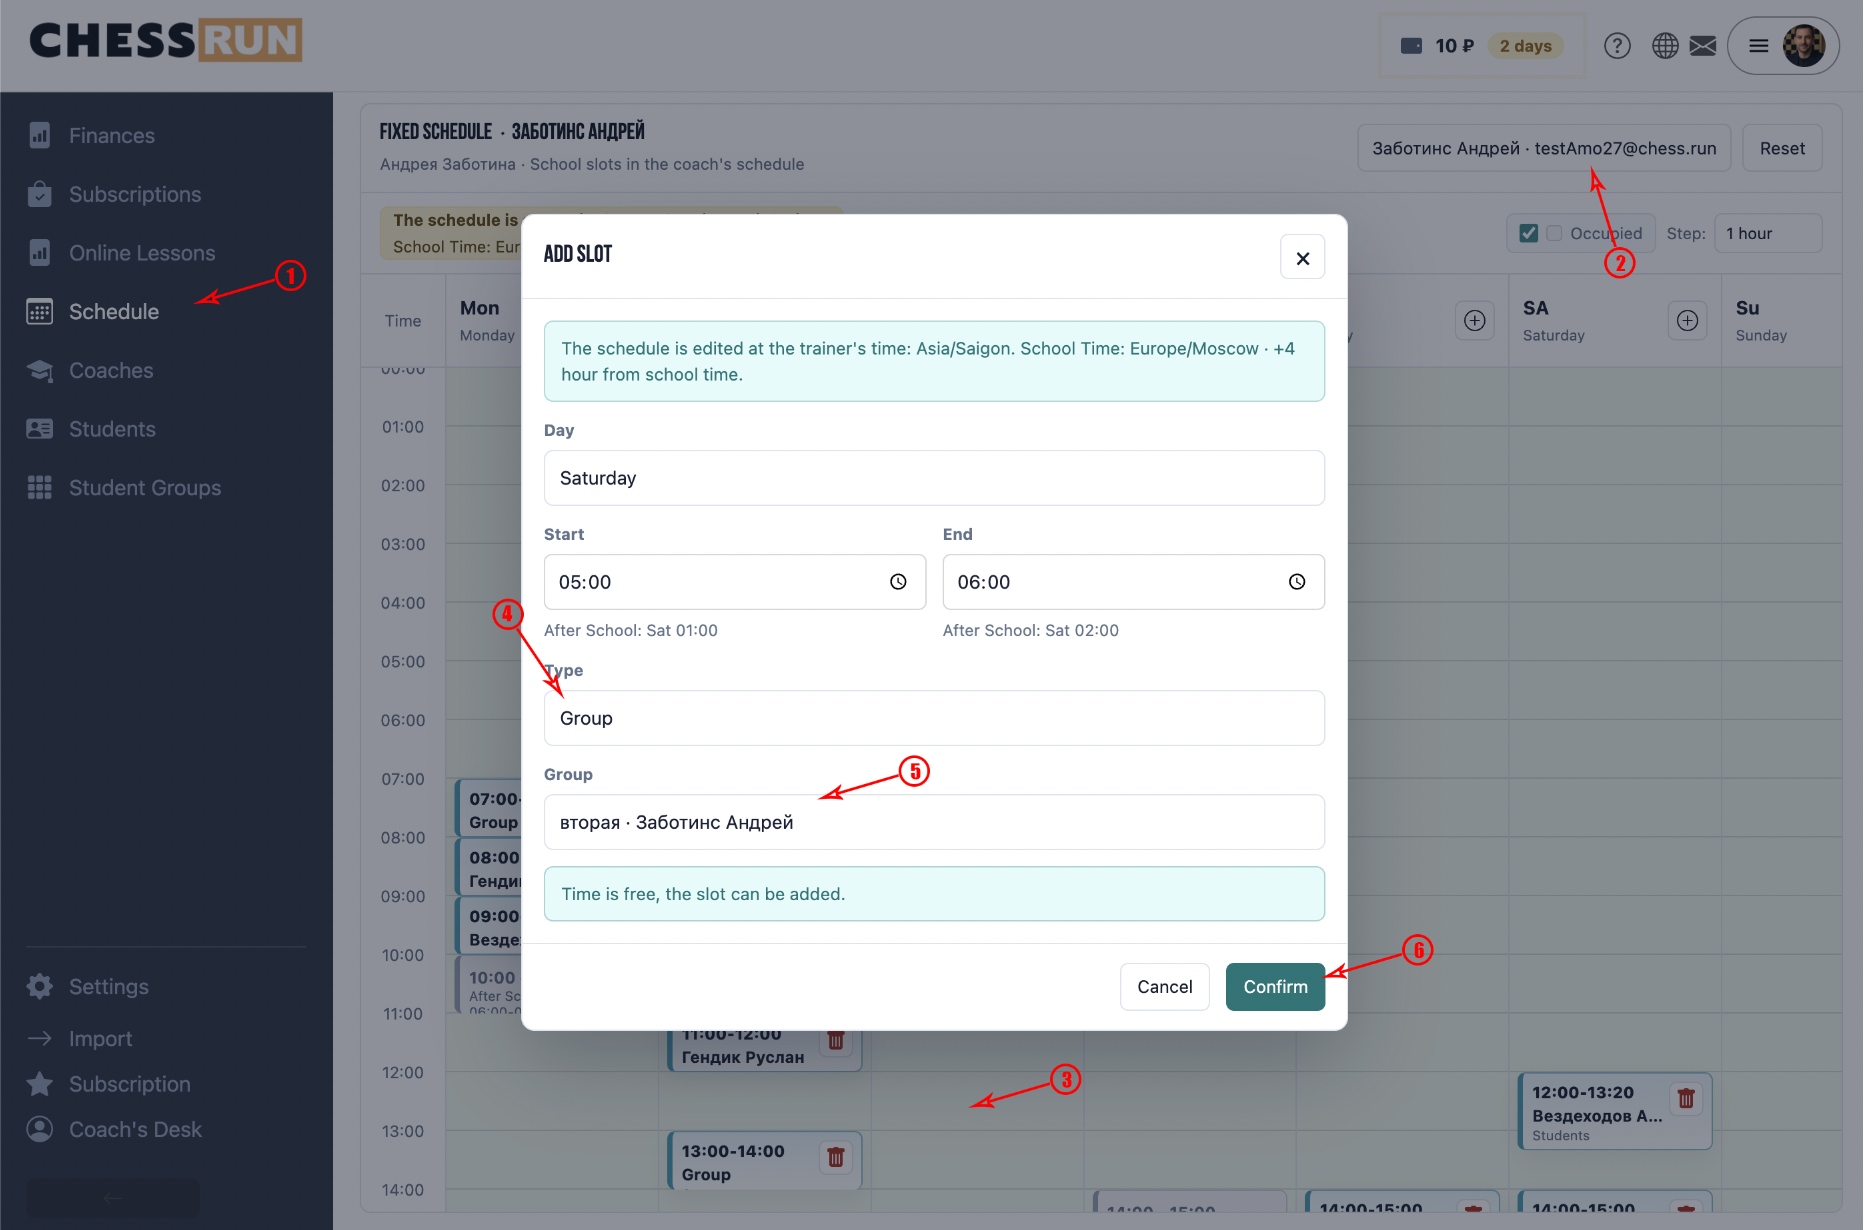
Groups can be used in the school’s regular schedule. If a group is added to a schedule slot, future lessons for this group will be created automatically. The group’s membership determines who participates in group lessons.
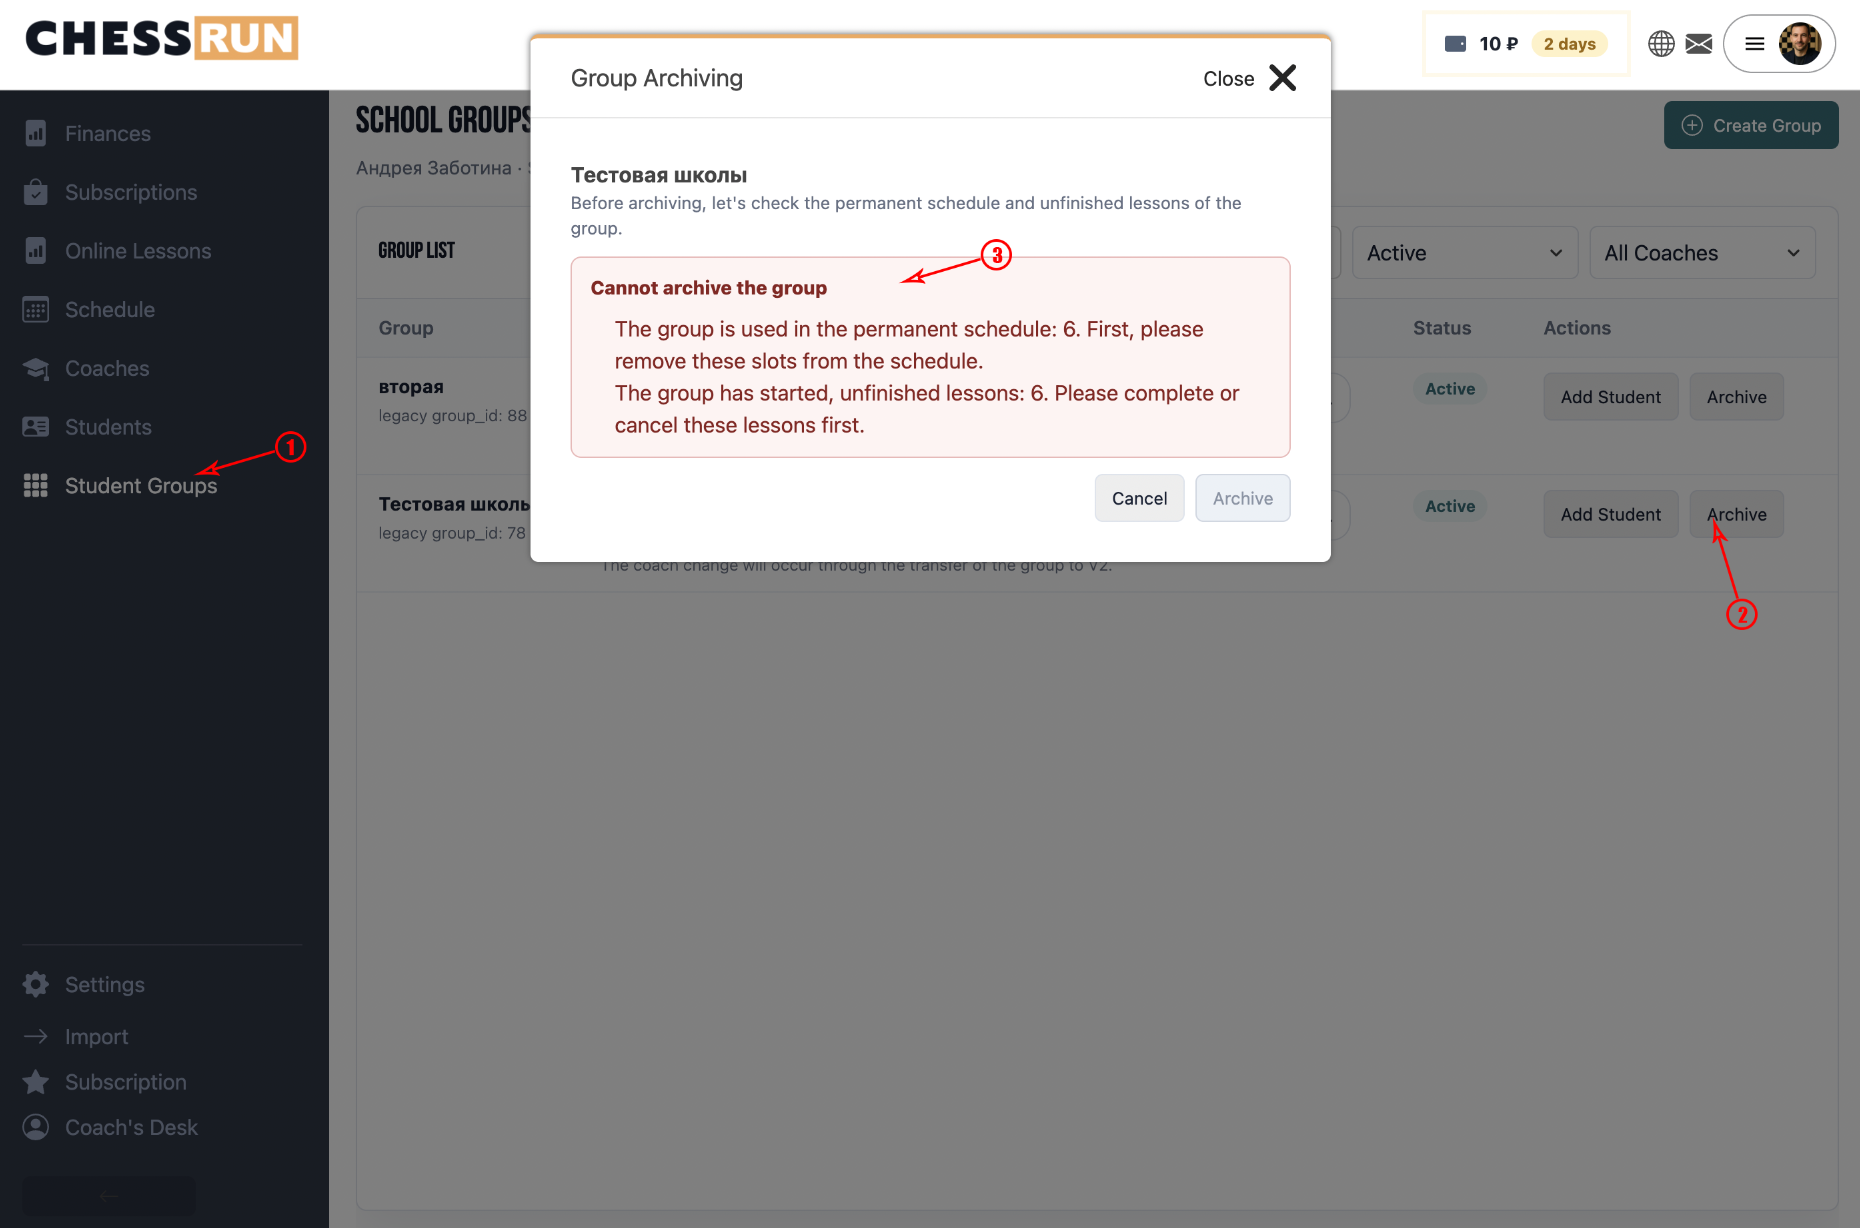
You can archive a group if it is no longer used.
Before archiving, the system checks:
- if the group is scheduled in the regular timetable;
- if there are upcoming non-cancelled group lessons;
- if there are past unfinished group lessons.
If such links exist, the system will display a warning and will not allow the group to be archived.
To archive a group, first remove it from the schedule, cancel upcoming lessons, and finish or cancel any past unclosed lessons.
After archiving, the group disappears from the active list.
The following data are preserved:
- lesson history;
- financial transactions;
- student data;
- completed group lessons.
Archiving does not delete history—it only removes the group from ongoing work.
FAQ
What if a student is missing from the list when adding to a group?
First add the student in the 'Students' section. After that, you can add them to any group.
Can I restore an archived group?
It is not possible to restore a group directly, but the lesson history and financial data of the archived group are saved and available for viewing.